Licia Miller Product Manager
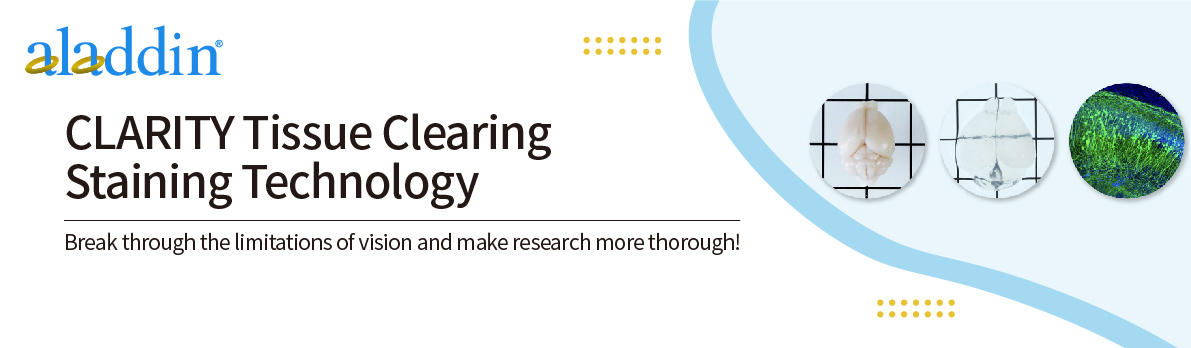
CLARITY (Clear Lipid-exchanged Acrylamide-hybridized Rigid Imaging/Immunostaining/Insitu hybridization-compatible Tissue hYdrogel) is a revolutionary tissue clearing and staining technology that enables three-dimensional imaging and analysis of intact biological tissues by combining hydrogel fixation and lipid removal.
The main purpose of CLARITY technology is to transform intact biological tissues (such as brain, liver, etc.) into a transparent state while retaining the in situ information of biological molecules (such as proteins, nucleic acids, etc.) in the tissue. This technology enables scientists to perform three-dimensional imaging of tissues without slicing and observe details such as neural networks, cell-to-cell connections, and subcellular structures.
The core principle of CLARITY technology is to immerse the tissue in nanoporous hydrogels, so that the hydrogels form covalent bonds with the biomolecules in the tissue (such as proteins, nucleic acids, etc.), thereby fixing the tissue structure. Subsequently, through electrophoresis technology, charged sodium dodecyl sulfate (SDS) micelles are used to remove lipids in the tissue, making the tissue transparent. Finally, the transparency effect is further optimized by a refractive index matching solution (such as FocusClear or glycerol solution).
Tissue Selection
In principle, any tissue type (fluorescent or not) from any animal of any age can be used. In previous papers reported by researchers, CLARITY was demonstrated to be compatible with whole brains of adult mice, whole brains of adult zebrafish, and formalin-fixed postmortem human brain sections.
Tissues without fluorescent proteins can be labeled with antibodies or RNA probes as described in this protocol for imaging; if it is a tissue with strong fluorescent protein expression, the immunofluorescence staining step in this protocol can be ignored for CLARITY processing, and then imaged directly after refractive index correction and sealing.
Solution Preparation
1. Hydrogel Monomer Solution
Keep all reagents on ice and dissolve 1 g of a water-soluble azo initiator (e.g., VA-044) in 10 mL of ultrapure water to prepare a 10% stock initiator solution.
Then prepare the solution according to the following recipe (80 mL per tissue sample) :
|
Note that low temperatures can effectively prevent hydrogel polymerization, so make sure all reagents and final solutions are kept on ice throughout the process.
This solution can be stored indefinitely at -20°C.
2. SDS clearing solution
|
The pH of the above solution was adjusted to 8.5 using boric acid.
3. PBST (containing 0.1% Triton-X and 0.1% sodium azide )
|
4. Optical clearing solution
The solution consisted of 23.5% (w/v) N-methyl-D-glucamine, 29.4% (w/v) diatrizoate, and 32.4% (w/v) iodixanol in water.
The specific formula is as follows:
|
Note: Add the reagents in the order above, stirring thoroughly with a stirring rod at each step to ensure that the powder is completely dissolved (shake if necessary, but do not heat, otherwise it will cause the solution to change color).
Since a small amount of water evaporation will cause precipitation, it can be sealed with tape or sealing film when storing, and remember not to let the water lose.
Experimental Steps
Phase 1 Perfusion and Tissue Preparation
1. Prepare freshly prepared hydrogel monomer solution. If it is a frozen stock solution, it needs to be completely thawed at 4⁰C or on ice until it becomes completely transparent.
Take care to ensure that there are no precipitates or bubbles in the solution.
Deeply anesthetize the animal with beuthanasia-D ( usual dosage, 0.5 mL per 1 kg body weight intraperitoneally ) .
3. Use a scalpel to open the chest cavity, make a midline incision in the abdomen and bifurcate it into a Y-shaped incision. Then make a small hole in the right atrium and insert the injection needle into the left ventricle for perfusion.
Note: Experiments involving animals must comply with government and institutional regulations. Animals must be fully anesthetized before incisions are made.
4. Prepare two syringes, one filled with ice-cold PBS and the other with hydrogel monomer solution, each with a winged needle set.
· For mice, first perfuse with 20 mL of ice-cold PBS at a rate of less than 5 mL/min, carefully withdraw the needle, and then perfuse with 20 mL of ice-cold hydrogel monomer solution.
· For rats, approximately 200 mL of each solution is required and perfused at a rate of 20 mL/min.
Note: Keeping the perfusion speed slow will achieve better results.
Also, be sure to avoid introducing air bubbles into the blood vessels (especially when inserting the needle).
5. Carefully remove the target organs and immediately place them into a 50 mL conical tube containing 20 mL of ice-cold hydrogel monomer solution and incubate on ice for one day to allow post-fixation and uniform penetration of the monomer.
6. Incubate the samples at 4⁰C for one day to allow the monomers and triggering molecules to further distribute throughout the tissue.
Stage 2 Hydrogel Tissue Embedding
1. After one day of incubation in the hydrogel monomer solution, transfer the tissue sample to 10 mL of fresh hydrogel monomer solution.
2. Place the conical tube in a drying chamber on a tube rack and unscrew the lid halfway to remove oxygen from the hydrogel-tissue hybridization process and prevent oxygen free radicals from terminating the polymerization reaction.
3. Connect the nitrogen and vacuum pump to the dryer through the three-way stopcock, open the airflow in three directions and turn on the nitrogen, let the gas flow for about 5 seconds to flush the residual oxygen in the pipeline.
4. To prevent oxygen from diffusing back into the pipeline, without shutting off the nitrogen flow, turn on the vacuum pump at the same time and adjust the stopcock so that the air flow only flows to the dryer and vacuum pump, and let the vacuum pump run for at least ten minutes.
5. Then very slowly turn the stopcock so that the gas flow is to the nitrogen and the desiccant only, then turn off the vacuum pump and allow the drying chamber to fill with nitrogen.
6. Quickly lift the lid of the desiccator, tighten the cap of the conical tube inside, and then turn off the nitrogen.
Be careful to close the cap of the conical tube quickly enough to prevent oxygen from re-entering and hindering the polymerization reaction.
7. Place the sample in a 37℃ warm room with gentle shaking for two hours.
8. To remove unreacted paraformaldehyde, the sample can be placed in 50 mL of clear solution and washed with gentle shaking at 37°C for 24 hours, repeated three times in total.
Note that this clear solution containing paraformaldehyde must be discarded as hazardous waste in accordance with government and institutional regulations.
Stage 3 Organizational Transparency
1. Add sample to the ETC chamber and close the lid and connect any remaining unconnected tubing.
2. Fill the measuring vessel with the SDS clearing solution first and place it on a surface a few inches above the heat exchanger and pump so that the buffer fills the tubing.
3. Start the pump and add more SDS clearing solution to the measuring vessel as needed to fill the entire system.
4. Connect the electrodes to the wires and start the power supply. The voltage is generally recommended to be around 40 V.
Note: Do not start the power supply unless you are sure that the flow rate is appropriate.
Also, when shutting down the system, always turn off the power supply before stopping the pump.
5. Check samples regularly to determine if the system is operating normally and transparency is ongoing. The whole process takes several days.
6. Remove the transparent sample from the ETC system and wash it twice with clean water, each time for 24 hours.
Stage 4 Immunofluorescence Staining of Clear Tissue
1. After clearing, immerse the tissue in 0.1% PBST (containing 0.1% Triton X-100) and wash three times at 37°C on a shaker for 24 hours each time to remove residual SDS and enhance antibody penetration.
2. Use primary antibody at a concentration 3-5 times higher than that of regular sections, dilute with 0.1% PBST, and incubate at 37°C for 2-7 days (adjust the time according to the thickness of the tissue).
Tip: If you need to label intracellular antigens (such as EpCAM), you can increase the concentration of the permeabilizing agent Triton X-100 to 0.5%.
3.After washing with the primary antibody (washing with 0.01% PBST for 1-3 days), dilute the fluorescent secondary antibody (such as AF594-labeled anti-rabbit IgG) at 1:50~1:100 and incubate at 37℃ in the dark for 2-7 days.
4. Add DAPI (1 μg/mL) to stain the nucleus for 5-10 minutes, wash again and store in PBST in the dark.
Stage 5 Refractive Index Correction and Imaging
1. Place the sample in optical clearing solution, incubate for one day, then transfer to fresh optical clearing solution and incubate for another day, making sure the amount of solution is sufficient to completely cover the tissue.
Note: Because evaporation of water from the optical clearing solution will cause the refractive index of the solution to change, thereby reducing the effectiveness of optical transparency, it is necessary to ensure that the container containing the sample and the refractive index calibration solution is completely sealed and airtight.
2. Image the transparent sample by mounting it between a glass slide and a black Willco dish.
3. Place the sample between the Blu-Tack sheets and add approximately 20 μL of optical clearing solution.
4. With the lip side facing up, press the Willco dish down firmly onto the adhesive until it just contacts the sample.
5. Using a pipette, add refractive index correction fluid into the gap between the adhesives until the imaging chamber is filled.
6. Carefully add the fast-curing adhesive KWIK-SIL into the gaps between the Blu-Tack to seal the sample, being careful not to introduce any air bubbles.
7. Cover with aluminum foil and after curing for 20 minutes, the sample is ready for imaging.
For more product details, please visit Aladdin Scientific website.